
You've seen the Instagram pantries. Every label aligned. Every container matching. Clear bins of quinoa that somehow look editorial. And then there's your pantry: a half-open bag of rice leaning against expired canned tomatoes, three open boxes of pasta, and a granola bar graveyard on the top shelf.
Here's the thing — most of those picture-perfect pantries don't look like that two weeks later. The ones that do? They weren't built around aesthetics. They were built around systems.
At Sorted, our professional organizers reset pantries every week. The difference between a pantry that stays organized and one that falls apart after the next grocery run isn't the containers you buy. It's the method behind the setup. This guide gives you that method.

Start With a $25 Consult — Get a Custom Pantry Plan
Every pantry is different. Shelf depths, family size, cooking habits, and grocery frequency all affect the right setup. A Sorted Sorter will walk through your space on a 25-minute Zoom video call, recommend specific products, and create a plan tailored to how your household actually eats.
Fully refundable if you cancel before it begins, or within 24 hours after.
Step 1: The Full Pantry Edit
Before you buy a single container, take everything out. And we mean everything. Lay it all out on your kitchen counter or table where you can see the full picture. This is the step most people skip, and it's the reason most pantry makeovers fail.
- Keep: Items you eat regularly, within their expiration date
- Donate: Unopened, unexpired items your household won't eat
- Toss: Expired, stale, or items you'll realistically never use
Pro Organizer Note: Clients often feel guilty about food waste during this step. Acknowledge the feeling, but remember: keeping expired or unwanted food doesn't un-waste it. It just makes your pantry harder to use, which leads to buying more duplicates — which creates more waste.
Step 2: Clean and Measure
With the pantry empty, wipe every shelf, vacuum the floor, and clean any sticky spots. Then measure your shelf dimensions: width, depth, and the height between each shelf. Write these numbers down before you shop for any products.
This step takes five minutes and saves you from the single most common pantry organizing mistake: buying containers that don't fit.
Step 3: Create Zones That Match How You Actually Cook
Zones are the backbone of a pantry that stays organized. Instead of placing items wherever they fit, assign each shelf or section a clear purpose:
- Eye-level shelf: Daily essentials — snacks, cereal, bread, go-to cooking staples
- Upper shelves: Less frequently used items — baking supplies, special occasion ingredients
- Lower shelves: Heavier items — canned goods, large bags of rice or flour, bulk items
- Door shelves: Spices, oils, vinegars, small condiments
- Kids zone: A designated low shelf with pre-approved snacks kids can grab independently

Pro Organizer Note: The kids zone is a game-changer for families. When children know exactly where their snacks live and can reach them without help, two things happen: they stop asking you every five minutes, and the rest of the pantry stays undisturbed.
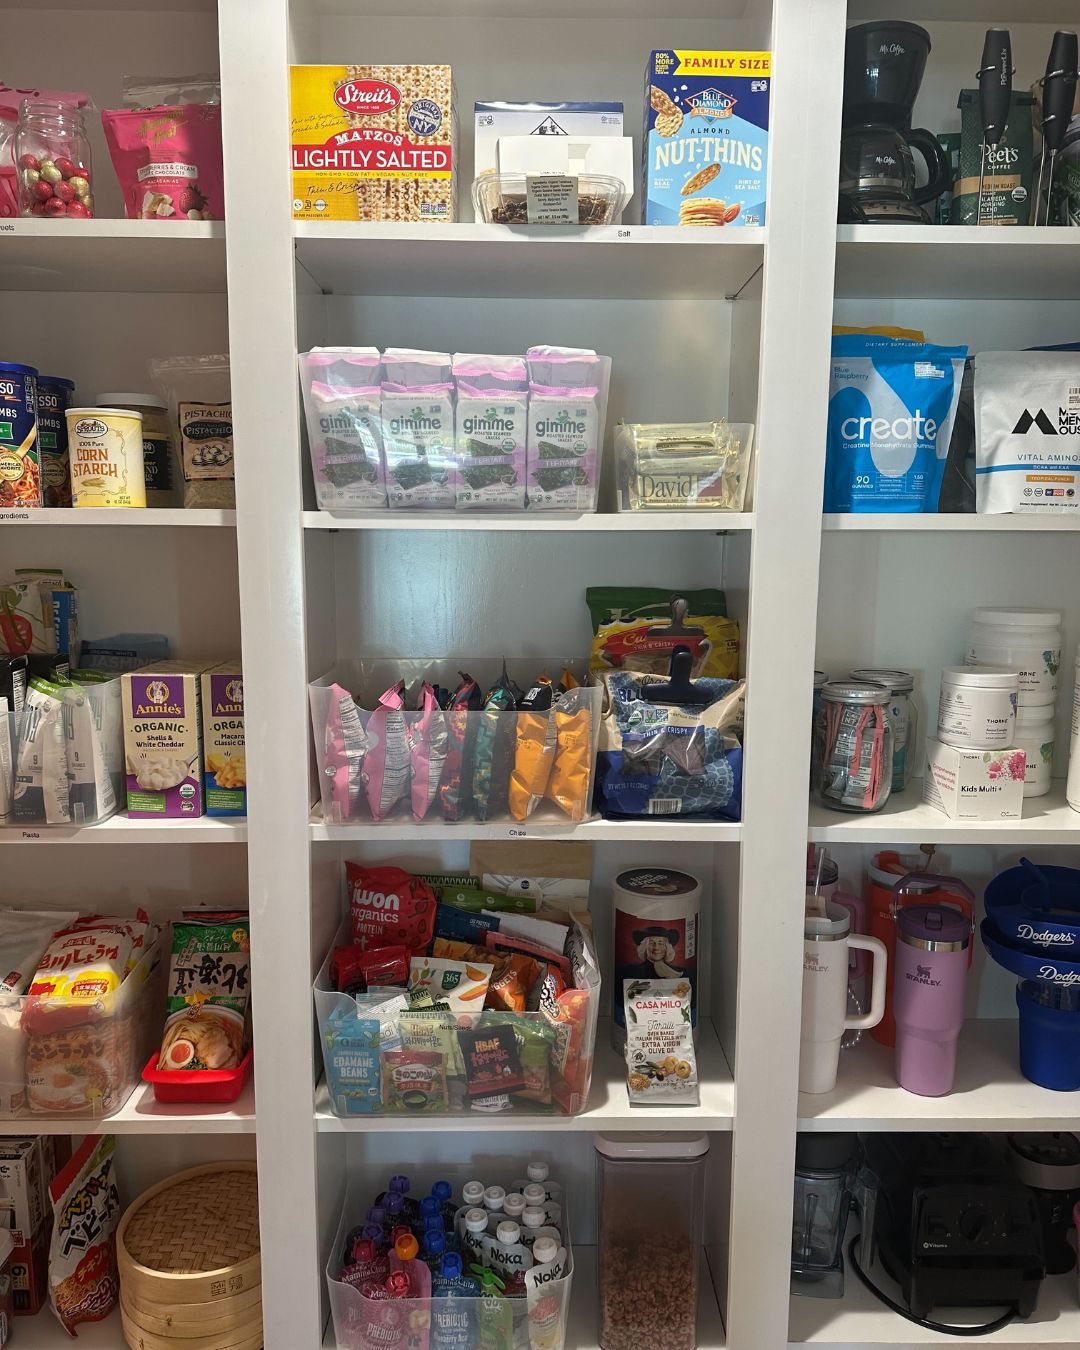
Step 4: Contain and Label
Now it's time for products — but only products that solve a specific problem:
- Clear stackable bins for grouping categories like snacks, baking, or breakfast items
- Turntables (lazy Susans) for oils, vinegars, and condiments — one spin and everything is accessible
- Can risers for creating stadium-seating visibility with canned goods
- Airtight containers for decanted dry goods — use these selectively, only when original packaging is genuinely bulky
- Shelf risers for doubling your usable vertical space on tall shelves
Then label everything. Labels aren't about aesthetics — they're about accountability. When a bin is labeled "Snacks," every person in the house knows where snacks go.
Pro Organizer Note: You don't need a fancy label maker. A piece of masking tape and a marker works just as well. The goal is communication, not decoration.
Step 5: The Grocery Reset Habit
The single most important maintenance habit is what we call the grocery reset: every time you put groceries away, you spend two extra minutes pulling older items to the front and placing new items behind them.
This is the FIFO method (first in, first out) that restaurants and commercial kitchens use. It takes almost no time once it becomes habit, and it dramatically reduces the chance of food expiring in the back of a shelf.
Common Pantry Mistakes (And How to Avoid Them)
- Buying containers before measuring: Always measure first. Every single time.
- Over-decanting: If the original packaging fits and is easy to use, leave it alone
- Too many categories: "Snacks" is better than separate bins for sweet, salty, and kids snacks
- Ignoring the floor: Your pantry floor is usable space — perfect for heavy and bulk items
- No kids zone: If you have children and no designated kids area, you're setting yourself up for daily chaos
Want a Professional Pantry Reset? Here's How It Works.
A Sorted pantry reset typically takes 2-4 hours depending on size. Your Sorter will edit, clean, measure, zone, contain, and label your entire pantry in a single session.
- Book a $25 virtual consult — walk through your pantry on Zoom, discuss goals, get a custom plan
- Receive your personalized product list — exactly what to buy, where to buy it, and what sizes
- Schedule your pantry reset session — in-home, on your timeline
Browse Sorters and Get Started
This post is part of our professional home organization system.
Ready to Get Sorted?
Stop spending weekends fighting clutter. Our professional organizers handle the heavy lifting so you can enjoy your space.
Fully refundable • No commitment • Book as needed
Already a customer or already booked a consult? Text us at (213) 523-7678
How long does a pantry organization project take?
Most pantry resets take 2–4 hours with a Sorter. DIY projects may take a full afternoon including shopping for products.
What are the best containers for pantry organization?
Clear, stackable bins for categories and airtight containers for decanted dry goods. Always measure your shelves before purchasing.
Do I need to decant everything into matching containers?
No. Decant only when the original packaging is bulky, hard to store, or prevents you from seeing how much you have. Function over aesthetics.
How does Sorted work?
Start with a 25-minute Zoom consultation with the Sorter of your choosing. They’ll assess your space, create a custom plan, and give you a transparent cost estimate. Every Sorter sets their own hourly rate with a 3-hour minimum. Book your consultation to get started.
.svg)
